DIY Short Almond Jelly Nails: Step-by-Step for Beginners
If you’ve been scrolling through nail content lately, you’ve probably stopped more than once at those dreamy, translucent nails that look like little drops of candy. That’s exactly what DIY short almond jelly nails are all about — a soft, glossy, glass-like finish on a flattering almond shape that works for every hand type. The best part? You don’t need to be a nail tech or spend $60 at a salon to get them. With the right products and a little patience, you can do this completely at home. This guide is written for total beginners, so we’re going step by step, explaining everything in plain language. No jargon, no confusion — just beautiful nails by the end of it.
What Are Jelly Nails and Why the Almond Shape?
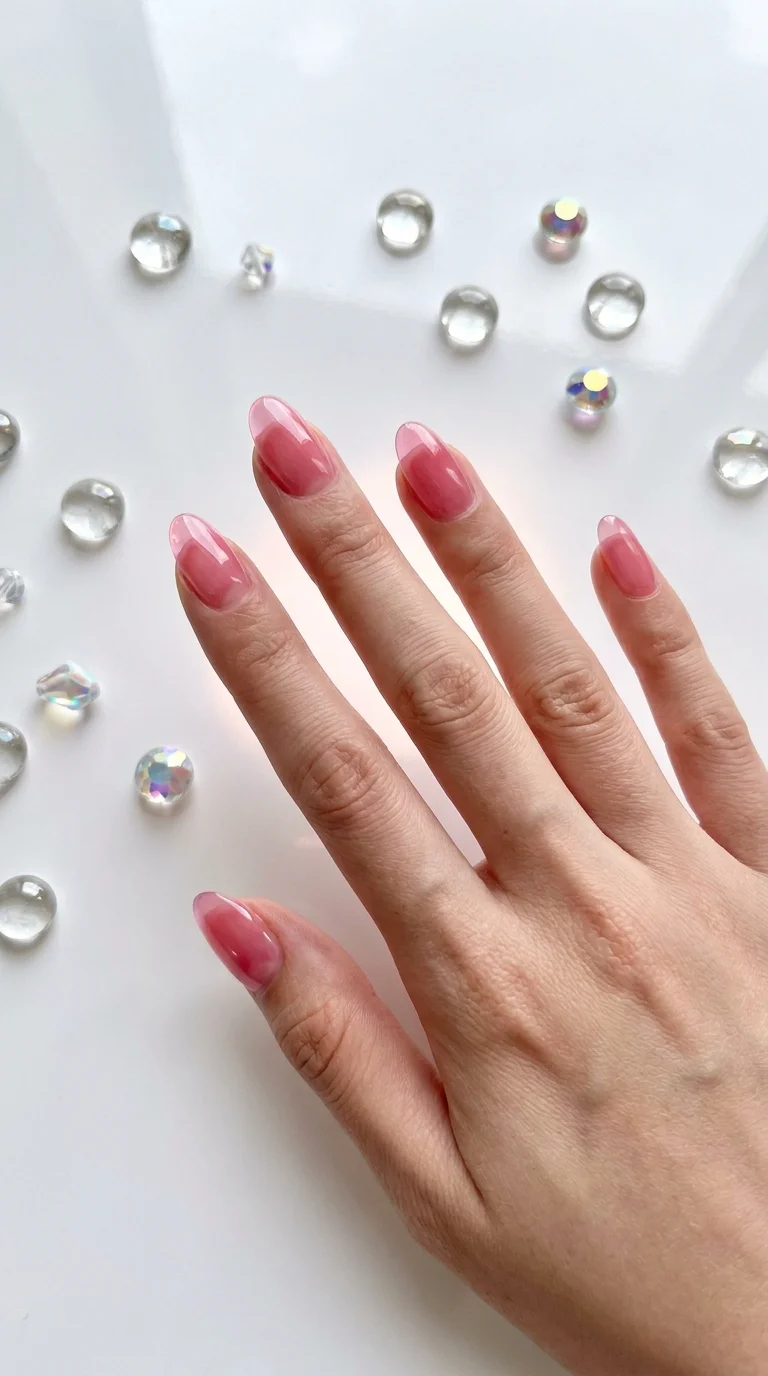
Before we get into the how, it helps to understand the what. Jelly nails get their name from their semi-transparent, gel-like appearance. They’re inspired by the squishy jelly sandals from the 90s — and honestly, the vibe is just as fun. The finish looks almost like stained glass or a hard candy, with a deep inner glow rather than a flat opaque color. They can be completely clear, lightly tinted, or layered with glitter and chrome for extra dimension.
Now, why the almond shape? The almond nail shape is tapered on the sides and rounded at the tip — like the silhouette of an actual almond. It’s one of the most universally flattering nail shapes because it makes fingers look longer and slimmer without being as fragile or dramatic as stiletto nails. For short nails specifically, an almond shape adds elegance without requiring length, making it perfect for everyday wear. When you combine that with the jelly effect, you get something that feels both polished and playful at the same time.
Short almond jelly nails have become especially popular because they’re low maintenance, they don’t catch on things throughout the day, and they still photograph beautifully. If you want nails that look intentional and stylish without being over the top, this is the look to try.
Tools and Products You Need Before You Start
Getting your supplies ready before you sit down is one of the most important things you can do for a smooth experience. Running back and forth to find a file mid-manicure leads to smudges and frustration. Here’s everything you’ll need laid out clearly so you can prep in one go.
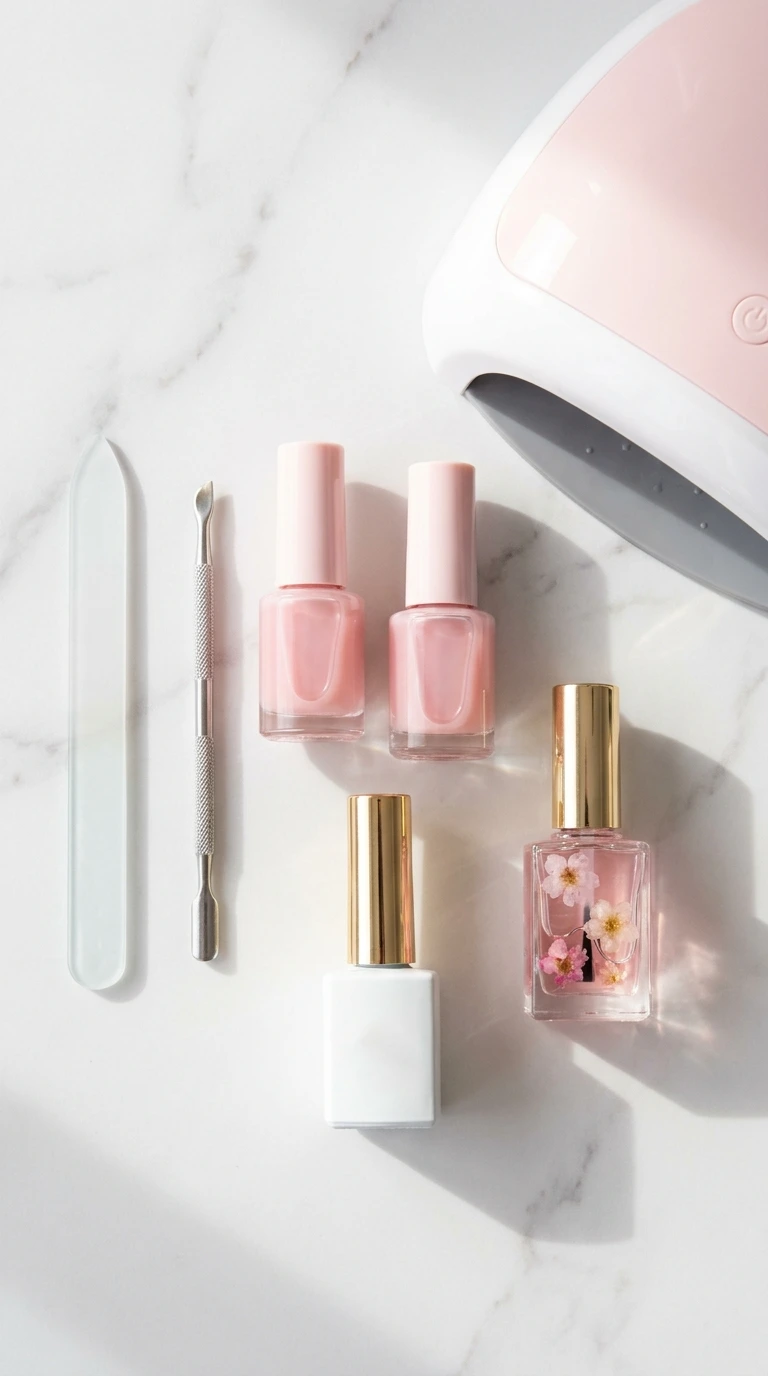
Nail preparation tools: a nail file (180/240 grit works great for shaping), a cuticle pusher, a cuticle nipper (optional but helpful), a buffer block, and a lint-free nail wipe or cotton pad.
Products for the jelly nail look: a nail dehydrator or isopropyl alcohol, a base coat (thin and sticky works best), a sheer or translucent jelly nail polish or gel polish in your color choice, a glossy top coat, and a UV/LED lamp if you’re using gel formula. If you’re going the regular polish route, you’ll skip the lamp.
Optional but recommended extras: cuticle oil for finishing, nail glue or tips if you want to add a tiny bit of length, and a cleanup brush with acetone for crisp edges.
For colors, the most popular jelly nail shades for beginners are soft pink, lilac, milky white, peach, and clear with a warm tint. You can find sheer gel polishes from brands like ILNP, Beetles, Makartt, or even drugstore brands that have translucent finishes. Look for words like “sheer,” “jelly,” or “glass” on the label.
How to Shape Short Nails Into an Almond Shape
Shaping is arguably the most important step in this whole process. Even the most perfect polish job won’t look great if the shape is off. The good news is that shaping short nails into an almond is simpler than it looks once you understand the technique.
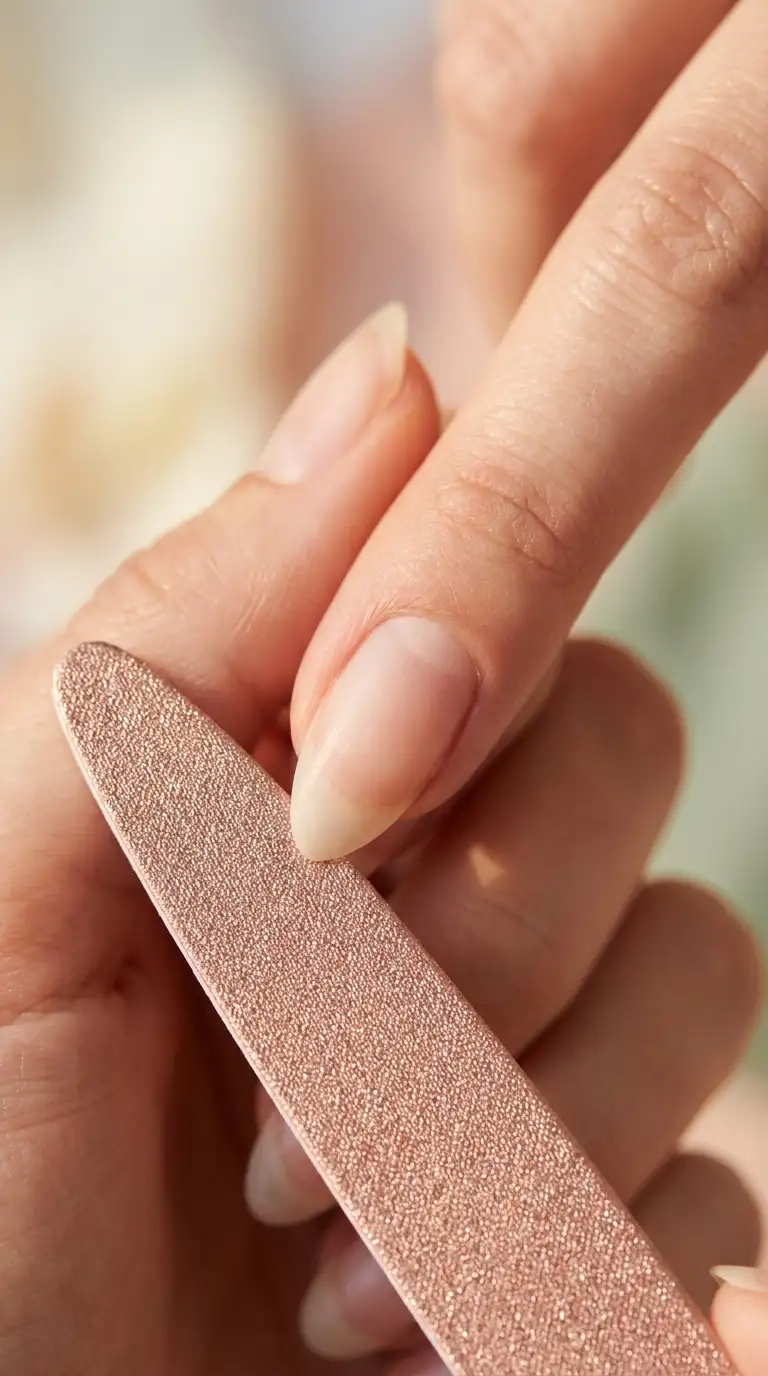
Start by trimming your nails straight across if they’re uneven. You don’t need much length for a short almond — just a tiny bit of free edge beyond the fingertip is enough to work with. If your nails are very short and bitten down, you can use nail tips or a soft gel extension to add just a millimeter or two before shaping.
Hold your file at a 45-degree angle toward the center of the nail from each side. File from the outer corners toward the middle tip in smooth, one-direction strokes. Avoid sawing back and forth, as that weakens the nail. Keep checking symmetry as you go — hold your hand up at eye level and compare each nail from the front. The final shape should have a soft point at the center that’s rounded (not sharp), with gentle tapered sides. Once you’re happy with the shape, buff lightly across the surface of the nail to remove any shine. This helps polish adhere better and prevents peeling.
Preparing Your Nails for the Jelly Finish
Nail prep is the step most beginners skip — and it’s also the reason most DIY manicures don’t last. Spend five extra minutes here and you’ll get days more wear out of your DIY short almond jelly nails.
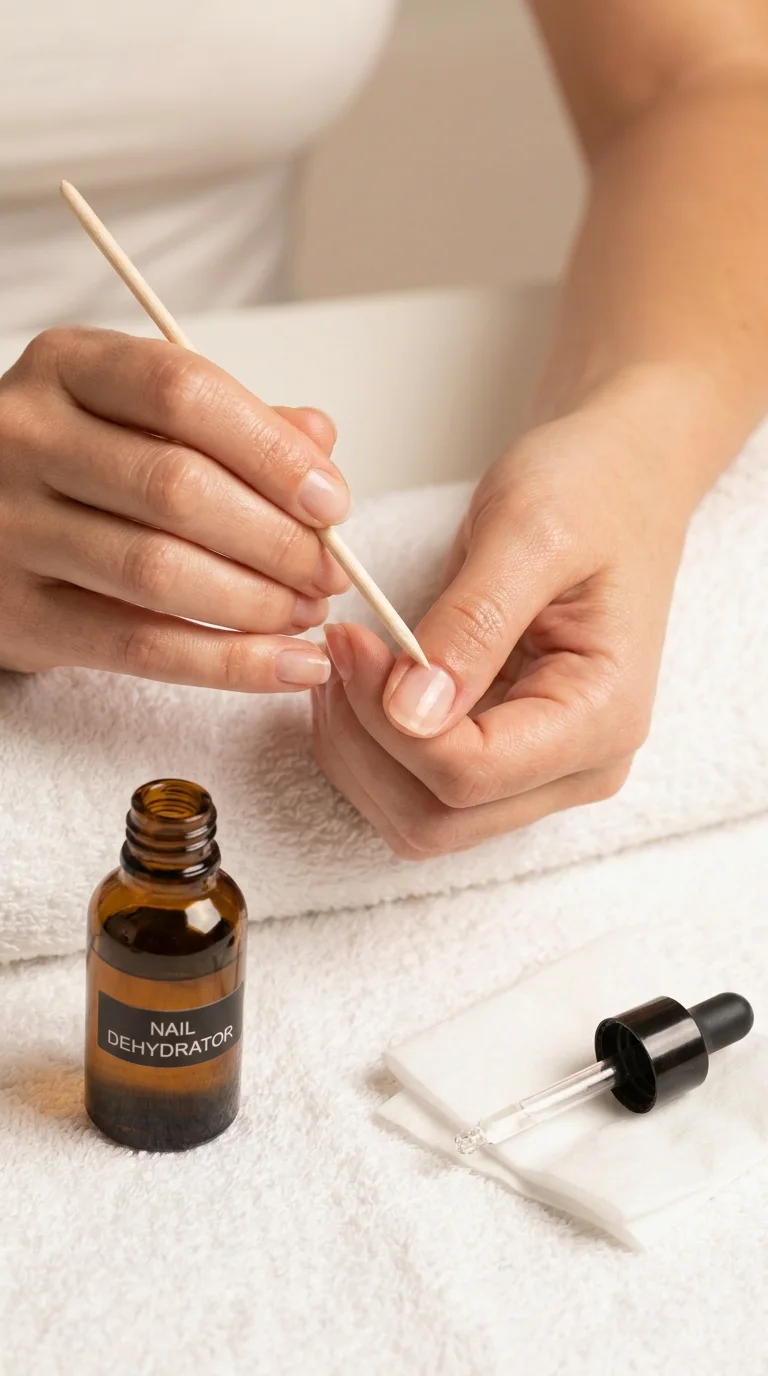
Push your cuticles back gently using a cuticle pusher after soaking your hands in warm water for a minute or two, or after a shower when skin is soft. You don’t need to cut cuticles unless there are hangnails — just push them back toward the base of the nail. This creates a clean, wide nail surface for polish to grip.
Next, wipe each nail with a lint-free pad soaked in isopropyl alcohol or a nail dehydrator. This removes any natural oils, lotion residue, or moisture that would cause lifting. Don’t touch your nails after this step — even clean fingers transfer oils back to the surface. Apply a thin layer of base coat to each nail and let it dry fully (or cure under the lamp for 30–60 seconds if using gel). The base coat protects your natural nail and gives the color something to bond to.
Step-by-Step: Applying the Jelly Nail Color
This is the fun part. The secret to a true jelly nail effect is building thin, sheer layers rather than trying to get full coverage in one coat. Here’s how to do it properly so your nails look translucent and glowy — not streaky or patchy.
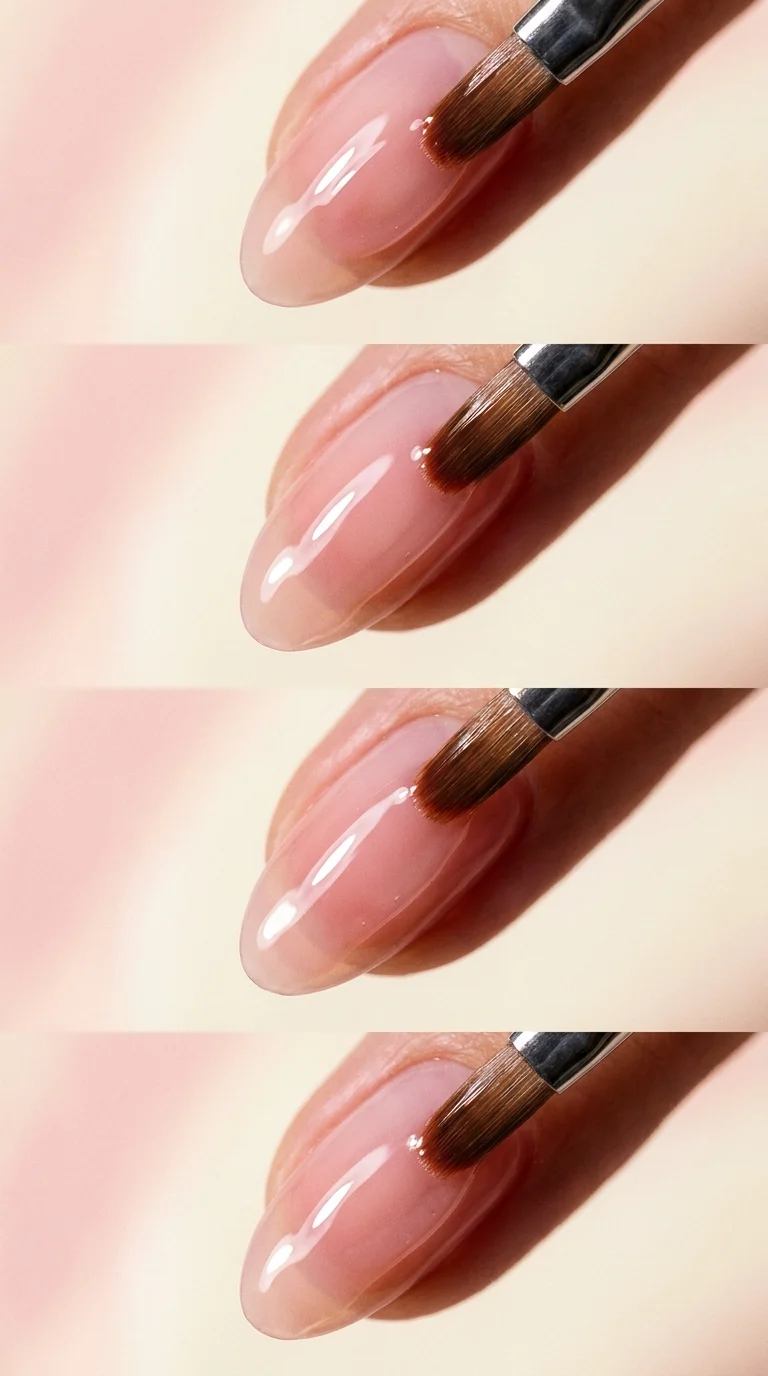
Step 1 — First coat: Apply a very thin layer of your jelly polish. It will look almost invisible, and that’s perfectly fine. The goal of this first coat is adhesion, not color. Brush from base to tip in three strokes — one down the center, one down each side. Cure for 60 seconds (gel) or let dry for 2–3 minutes (regular polish).
Step 2 — Second coat: Apply another thin layer. You’ll start to see the color building with depth and a glassy look. If you’re using a pink or peach shade, this is where that rosy glow begins to show through. Cure or dry again.
Step 3 — Third coat (if needed): Most jelly nails look best at 2–3 coats. If the color still looks too sheer for your taste, add a third. If you prefer a more transparent finish, stop at two. The beauty of jelly nails is that “incomplete” coverage is part of the aesthetic — you want to see depth, not a flat solid wall of color.
Step 4 — Top coat: This is what makes jelly nails look like glass. Apply a thick, glossy top coat generously over the entire nail, including wrapping a thin layer around the free edge. Cure fully. If you want an ultra-glassy finish, apply two top coat layers. The reflection and shine at this point should be almost mirror-like.
Pro Tips for Longer-Lasting DIY Short Almond Jelly Nails
Getting the look right is one thing — keeping it looking fresh for a week or more is another. Here are some tried-and-true tips that make a real difference in how long your short almond jelly nails hold up at home.
Wrap your tips. Every time you apply a coat, drag the brush lightly across the very edge of the nail tip. This seals the free edge and is the single most effective thing you can do to prevent chipping and lifting.
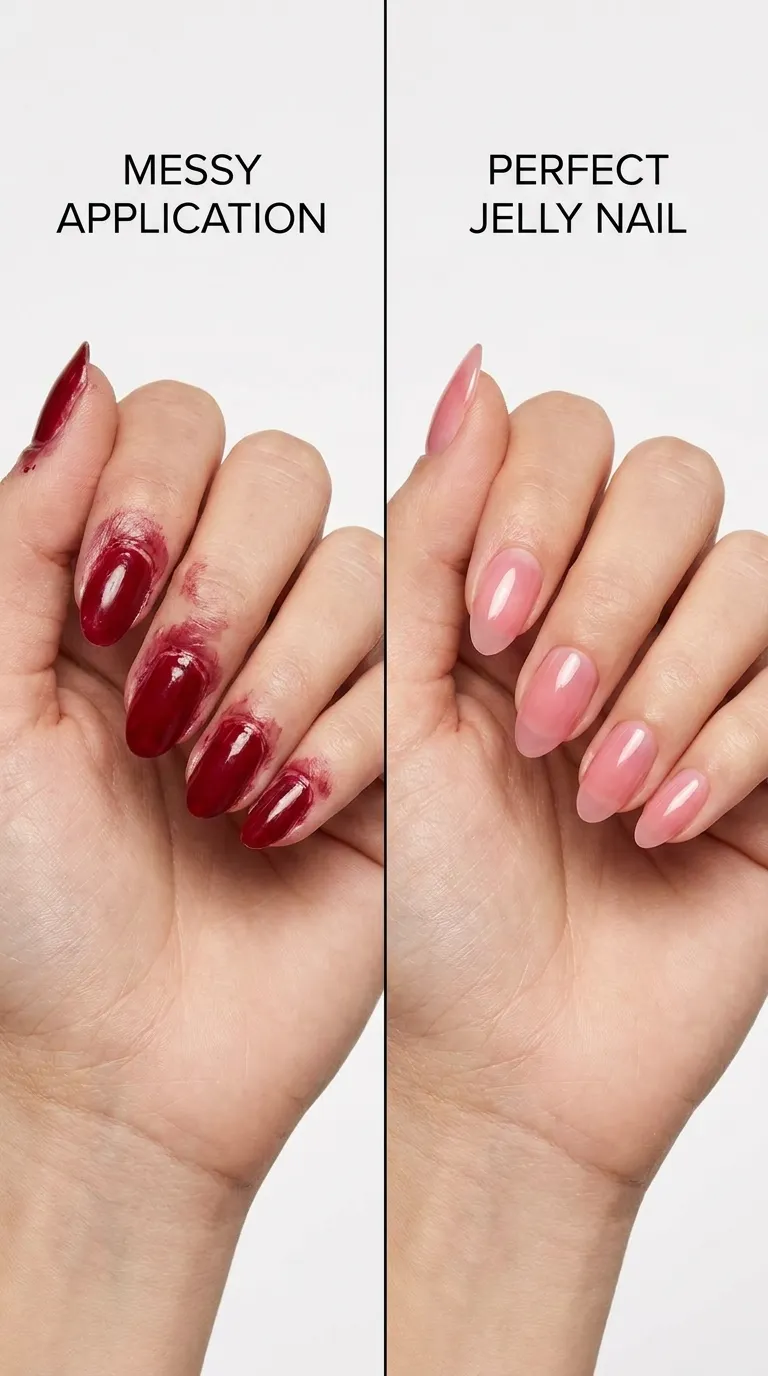
Avoid flooding the cuticle. Polish that touches the skin around your nail will peel away from the sides and take everything with it. Apply starting just a hair away from the cuticle and push outward.
Use thin coats, always. Thick coats don’t cure properly under a lamp and they bubble and wrinkle when they dry in the air. Thin coats give you a smoother, harder finish every time.
Cure thoroughly. Undercured gel lifts faster and feels tacky. Make sure your lamp is working and that you’re following the recommended cure times for your specific polish brand.
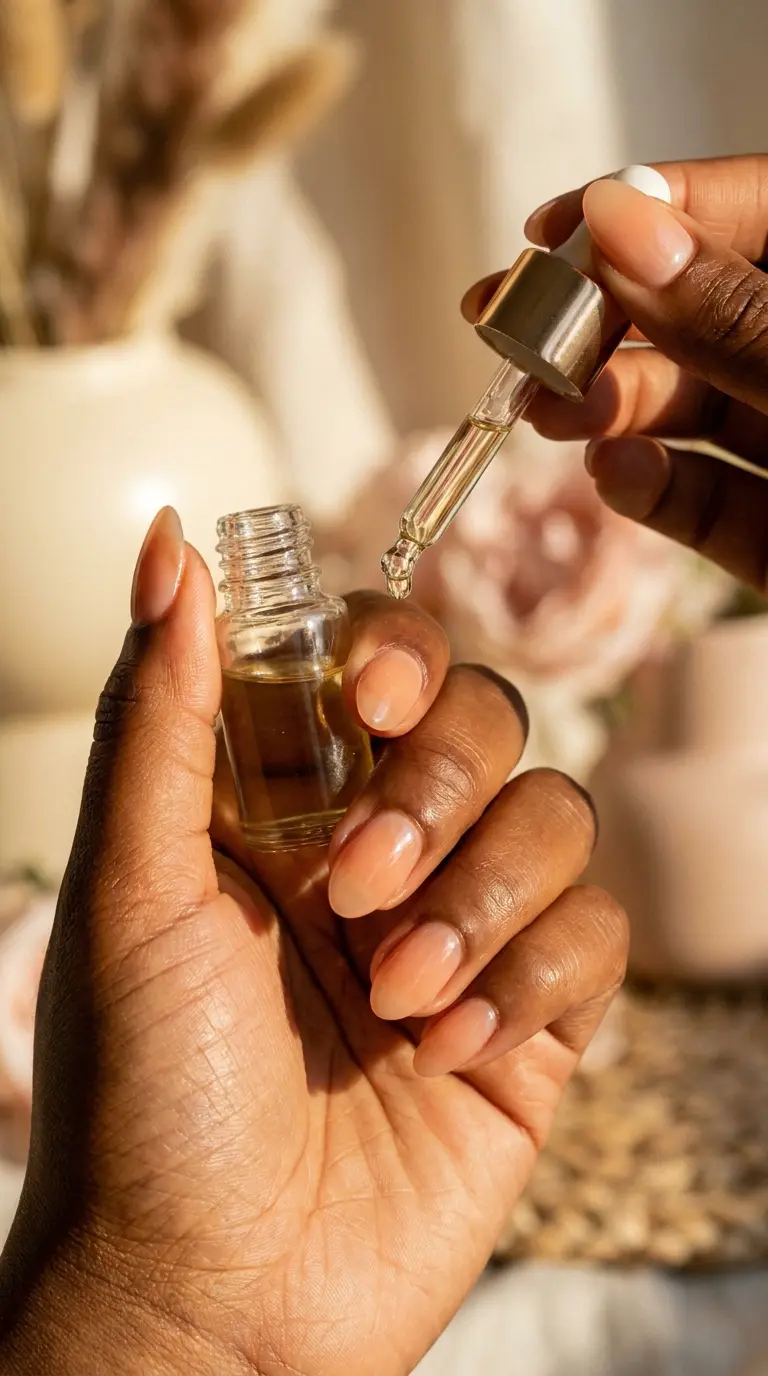
Finish with cuticle oil. Once everything is fully cured and dry, apply cuticle oil around the base and sides of each nail. This keeps the surrounding skin hydrated and makes the whole manicure look more polished and professional.
Popular Jelly Nail Variations to Try at Home
Once you’ve got the basic jelly nail technique down, there’s a whole world of variations to explore. These are some of the easiest and most popular looks that beginners can tackle without advanced skills.
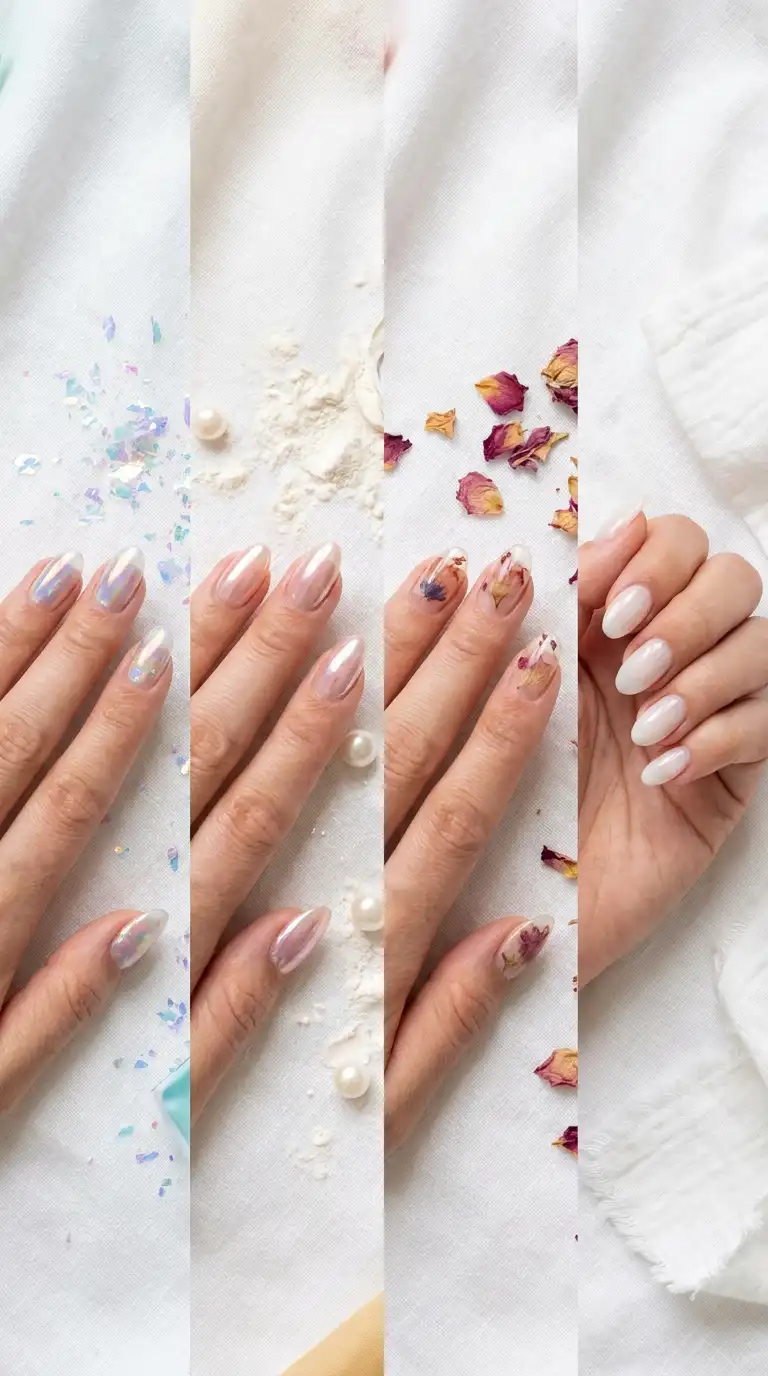
Aurora jelly nails: Also called unicorn or holo jelly nails, this variation adds a duochrome or aurora powder rubbed over the tacky top coat layer before a final clear seal. It creates a magical color-shifting effect that catches light differently from every angle.
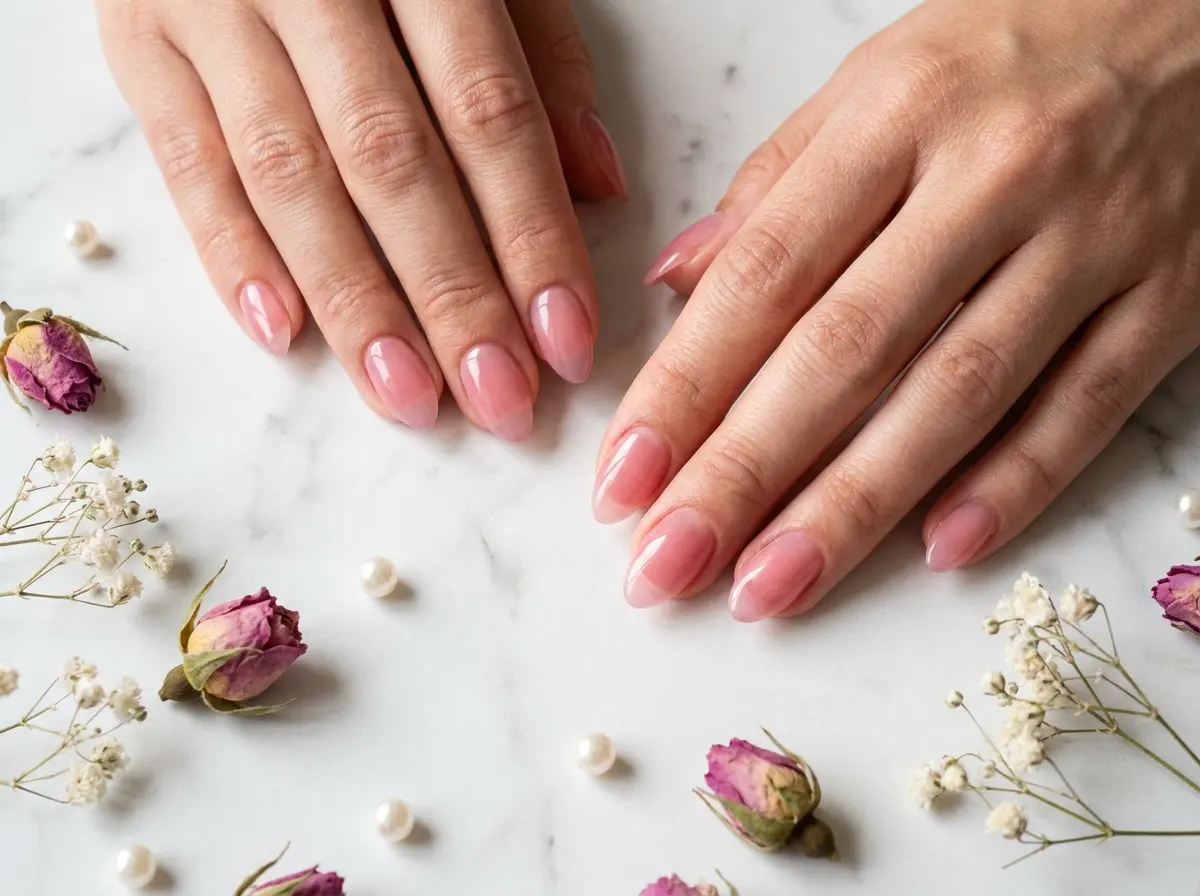
Glazed donut nails: A specific take on the jelly style made famous by Hailey Bieber. Use a sheer pink or peachy jelly base, then buff a chrome or pearl powder over the top coat while it’s still tacky. The result looks like the shiny glaze on a fresh donut — warm, rosy, and incredibly luminous.
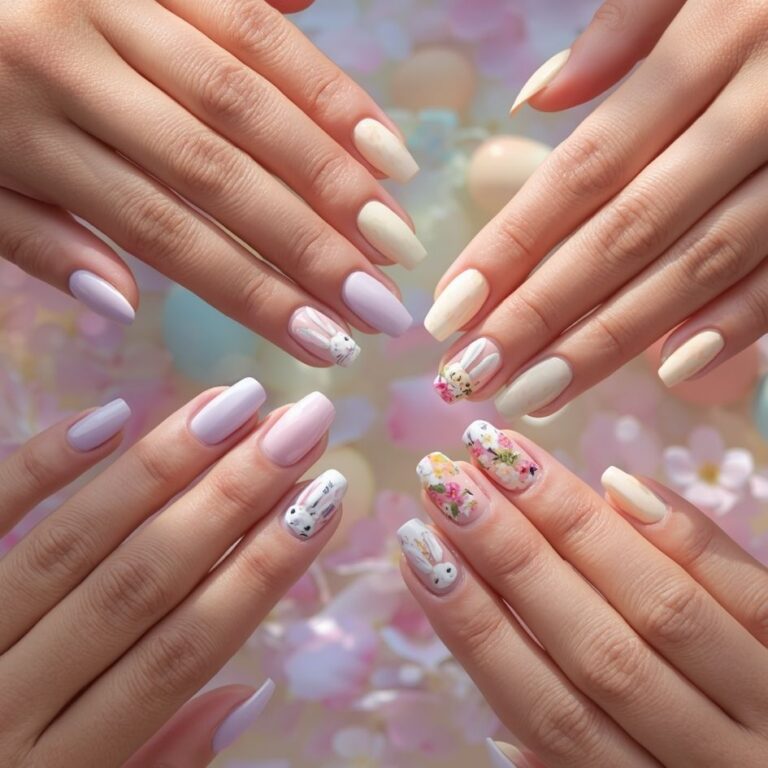
Jelly nails with dried flowers: Press a tiny dried flower onto your second-to-last coat before curing, then seal it with a final layer of top coat. The flower gets encapsulated inside the nail and looks absolutely stunning against a translucent background.
Milk jelly nails: Mix a sheer white or nude base for a milky, opaque-ish jelly look. This is more subtle than a bright tinted jelly but looks incredibly clean and sophisticated, especially on short almond shapes.
Common Mistakes Beginners Make (and How to Avoid Them)
Everyone makes mistakes when learning a new skill — the key is knowing what to watch out for so you can avoid the most common pitfalls. Here are the ones that trip up most beginners when trying DIY short almond jelly nails for the first time.
Using too much product: This is the number one issue. Whether it’s polish, base coat, or top coat — less is always more. Thick layers cause bubbling, wrinkling, and uneven curing.
Skipping base coat: Base coat isn’t optional. Without it, polish stains your natural nail (especially with colored jelly shades), and it peels off much faster. Always use it.
Filing in both directions: Back-and-forth filing creates micro-fractures in the nail that lead to peeling and breakage. File in one direction only, especially on the sides when shaping the almond point.
Touching nails mid-dry: Even if they feel dry to touch, regular polish takes much longer to fully harden below the surface. Wait at least an hour before doing anything rough with your hands after a regular polish manicure.
Skipping the clean-up step: A cleanup brush dipped in acetone and run along the edges of each nail takes 60 seconds and completely transforms how professional your finished manicure looks. Don’t skip it.

Frequently Asked Questions About DIY Short Almond Jelly Nails
These are the questions that come up most often when beginners are learning to do DIY short almond jelly nails at home.
Can I do jelly nails without a UV lamp?
Yes, absolutely. You can use regular nail polish with a sheer or jelly finish instead of gel polish. The process is the same — thin layers, let each one dry fully, and finish with a glossy top coat. The main difference is that regular polish takes longer to dry and isn’t quite as durable as gel, but it works perfectly well for beginners.
What’s the best base for jelly nails on short natural nails?
For very short natural nails, a rubber base coat or a sticky bond coat works best as the foundation. It gives the jelly layers something solid to grip and reduces lifting at the edges. Some people also apply a very thin layer of builder gel first to add a tiny bit of strength to the natural nail before applying color.
How many coats does it take to get the jelly effect?
Typically 2 to 3 thin coats of your jelly polish is enough. The translucent look you’re going for is achieved by not over-applying — you want to see a little depth and light passing through the color. More than 3 coats can start to look muddy or lose that glassy quality.
How long do DIY jelly nails last?
With proper prep and a good top coat, gel jelly nails can last 10–14 days on short nails. Regular polish versions tend to last 5–7 days before chipping. Refreshing your top coat every 3–4 days can extend the life of both significantly.
Can I shape my nails into an almond if they’re very short?
Yes! The almond shape is actually easier to achieve on shorter nails because you don’t need much free edge to work with. Even just 1–2mm beyond the fingertip is enough to create a soft, tapered almond shape. If your nails are bitten very short, nail tips or a soft gel overlay can give you just enough edge to work with.
Do jelly nails look good on all skin tones?
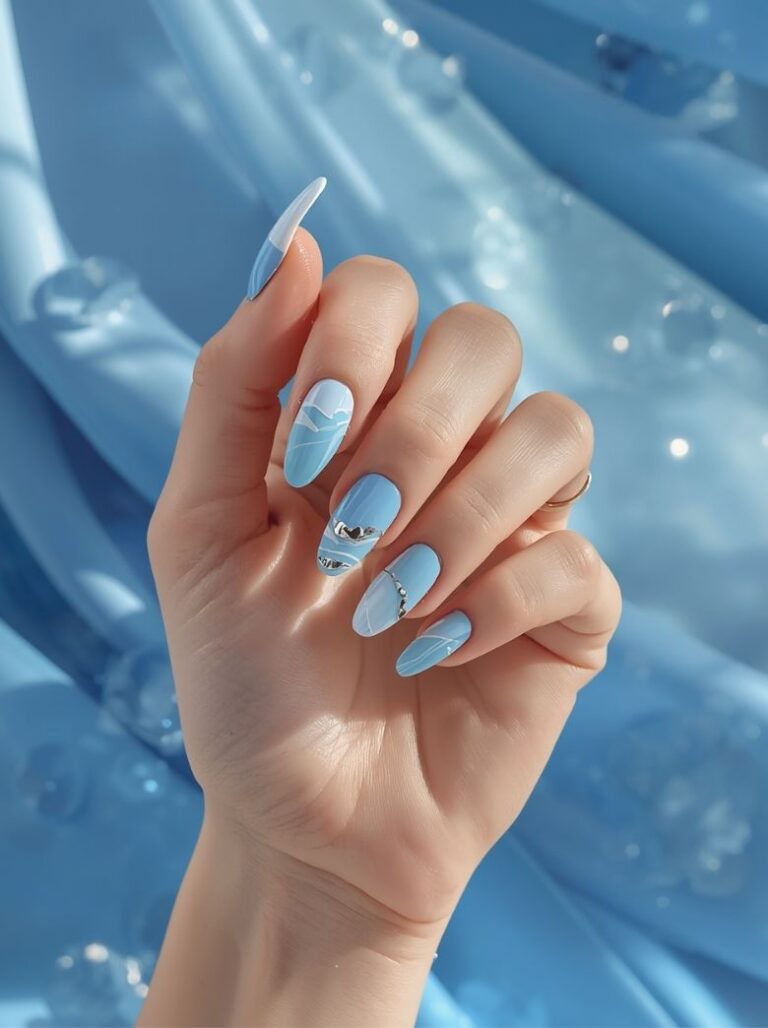
One of the great things about jelly nails is that they look beautiful on every skin tone. The sheer quality of the finish means the color blends naturally with your nail bed and skin rather than sitting on top of it like an opaque color. Warm skin tones look especially stunning in peach, coral, and amber jellies, while cool skin tones pop with lilac, rose, and icy clear tints.
Is it hard to remove jelly gel nails at home?
Removing gel jelly nails at home is straightforward if you do it correctly. Buff the top coat lightly to break the seal, then soak a cotton ball in acetone, place it on the nail, wrap with foil, and wait 10–15 minutes. The gel will soften and slide off easily. Never force it or peel — that damages your natural nail underneath.
Final Thoughts: Your First Jelly Nail Journey Starts Here
There’s something genuinely satisfying about doing your own nails well. When you look down and see those beautiful, glowy, translucent DIY short almond jelly nails that you made yourself — that feeling is worth every minute of practice. The technique isn’t complicated once you break it down step by step, and the supplies are affordable enough to experiment freely.
The most important things to remember are: prep your nails well, work in thin layers, seal your edges, and be patient. Each manicure will get easier and look better than the last. Start with a simple clear or light pink jelly, master the application, and then explore all the gorgeous variations — aurora, glazed donut, floral encapsulation — when you’re ready.

Short almond jelly nails are one of those rare nail trends that manage to feel both trendy and timeless. They suit every occasion, from casual everyday wear to a special event, and they never look overdone. So grab your supplies, put on a good playlist, and give it a try this weekend. Your nails are going to thank you.