15 Easy Spring Nail Art Designs You Can Do at Home (Beginner-Friendly)
Spring is here, and it’s the perfect season to refresh your look—starting with your nails! If you’ve been scrolling through Pinterest (and let’s be honest, who hasn’t?), you’ve probably noticed that easy spring nail art designs for beginners are absolutely everywhere right now. From delicate flower patterns to soft pastel gradients, spring nail trends 2026 are all about celebrating renewal and freshness.
The good news? You don’t need to be a professional nail artist to create gorgeous spring nails. In fact, simple DIY spring nail art at home is trending more than ever because it’s affordable, fun, and incredibly satisfying.
In this comprehensive guide, we’ll walk you through 15 beginner-friendly spring nail designs that look professional but are actually super easy to create. Plus, we’ll share the tools you need, the trending colors for spring, and pro tips to help you succeed on your first try.
Whether you’re looking for aesthetic spring nail ideas or trending minimal spring nail art, you’ll find exactly what you need in this post. Let’s get started!
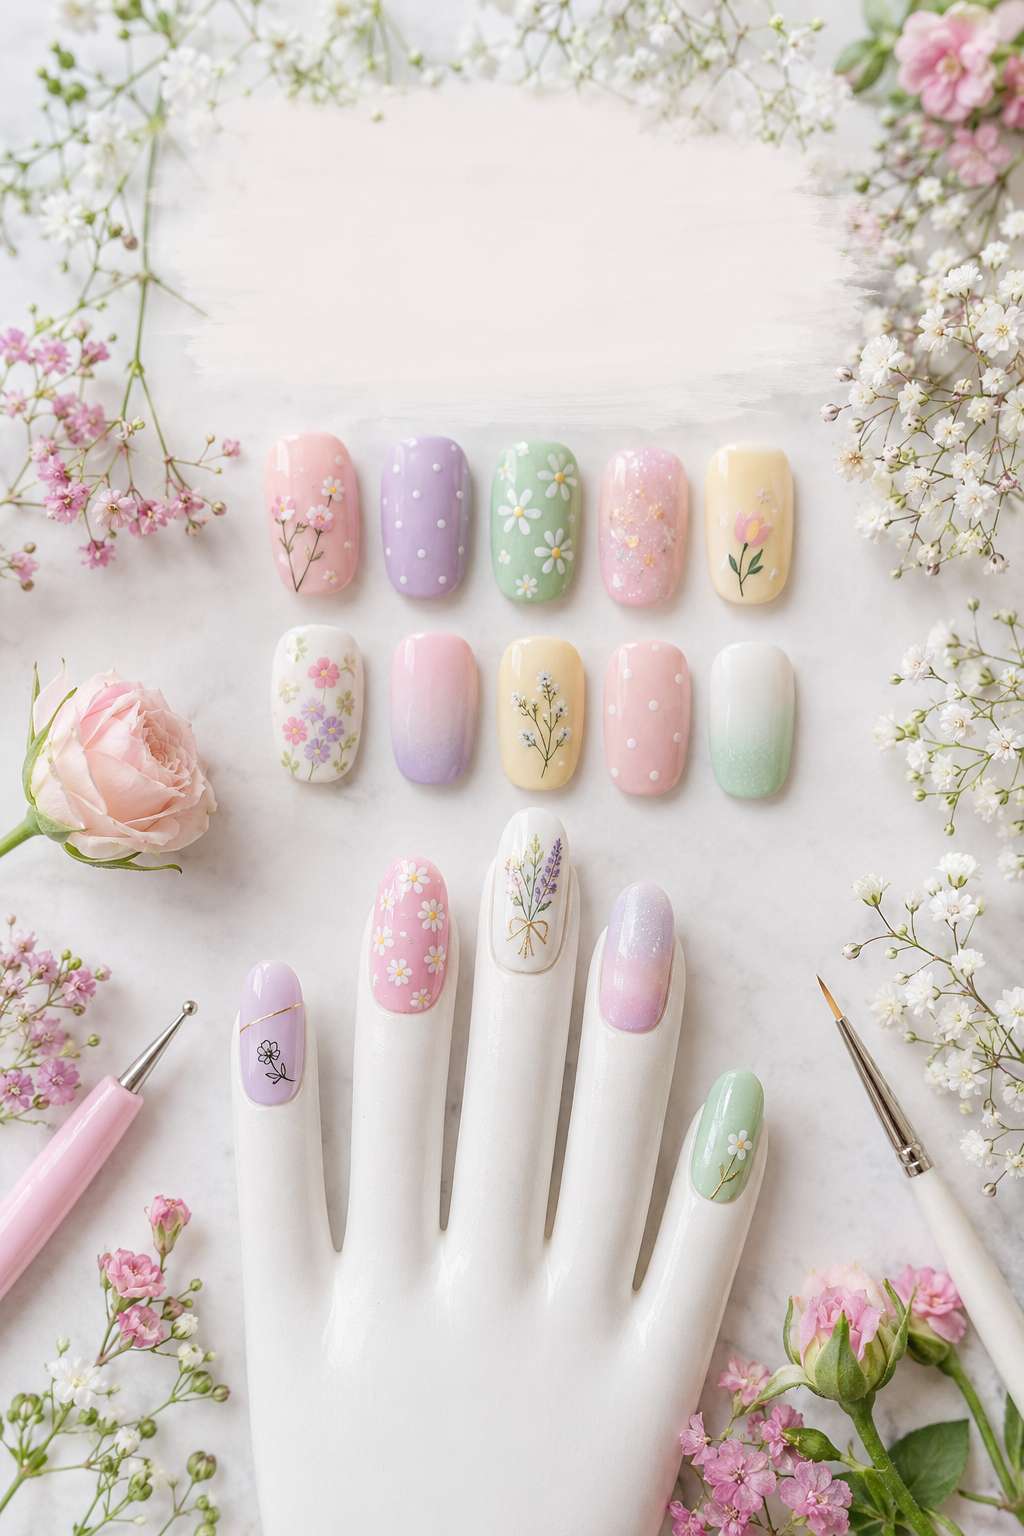
Top 15 Easy Spring Nail Art Designs for Beginners (With Tutorials)
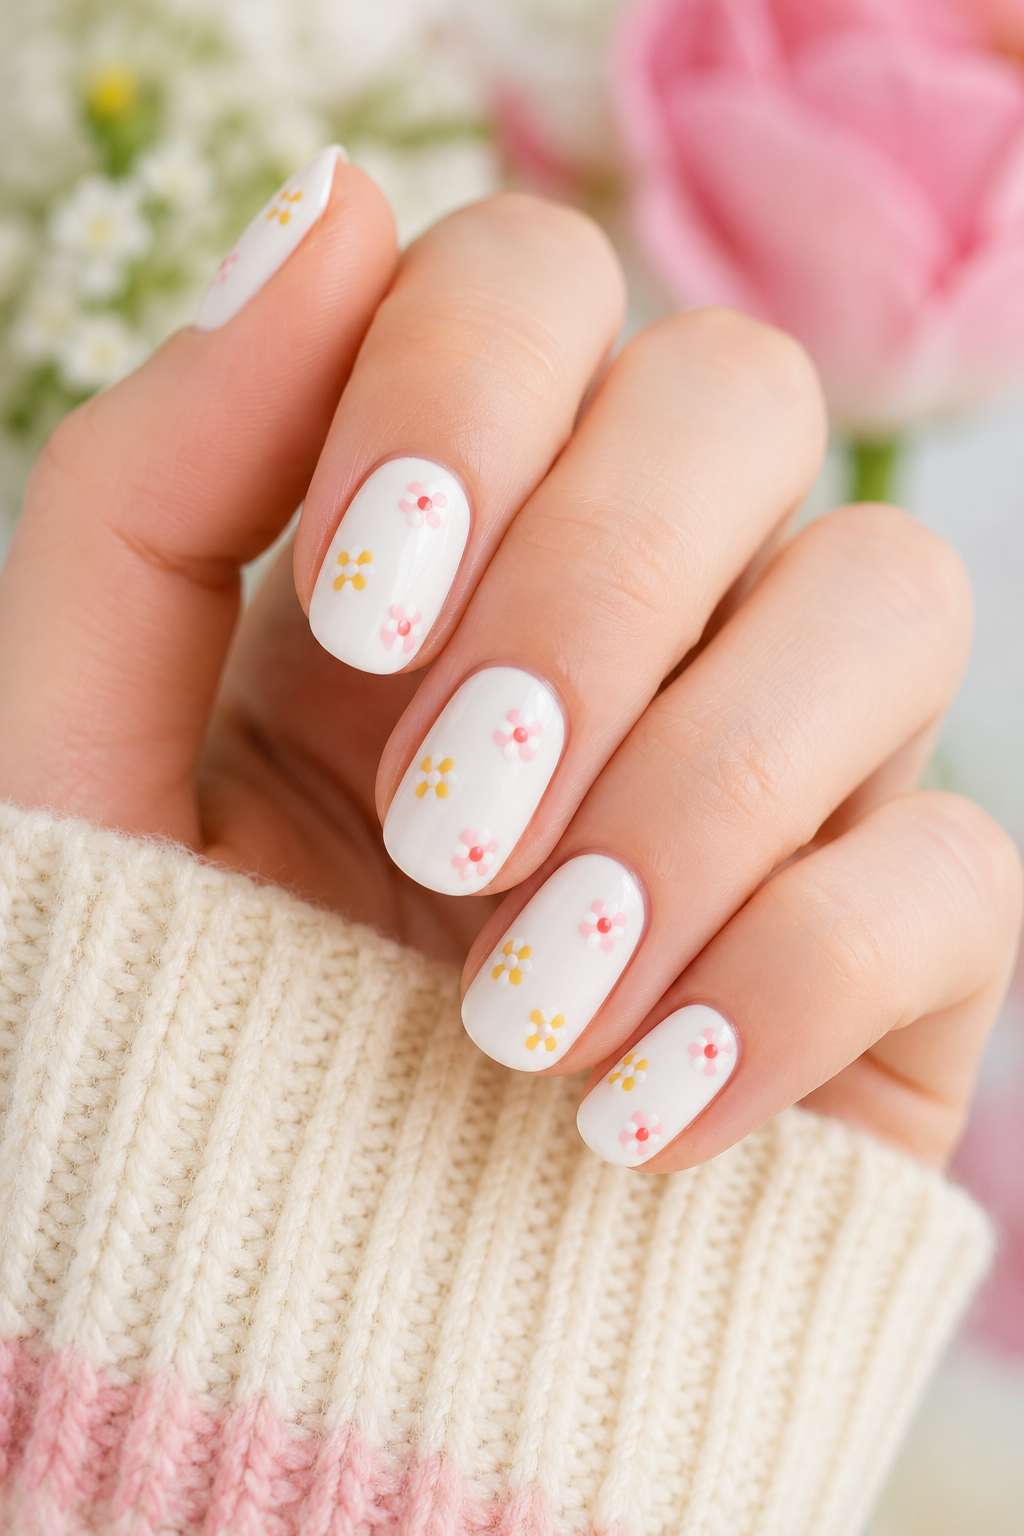
Minimalist Flower Dots – The Easiest Spring Design
Why it works: This design requires just a dotting tool and patience. Super forgiving for beginners.
Materials:
- White base polish
- Pink or peach nail polish
- Dotting tool (or bobby pin)
- Top coat
Step-by-Step Instructions:
- Apply white base coat (2 layers)
- Use the dotting tool to create small circles in a flower pattern (5 dots per flower)
- Add a tiny yellow dot in the center
- Space flowers randomly across the nail
- Seal with glossy top coat
Beginner Tip: If your dots aren’t perfect, they look even more charming! Organic imperfection is on-trend.
You May Like: How to Care for Your Nails at Home This Summer
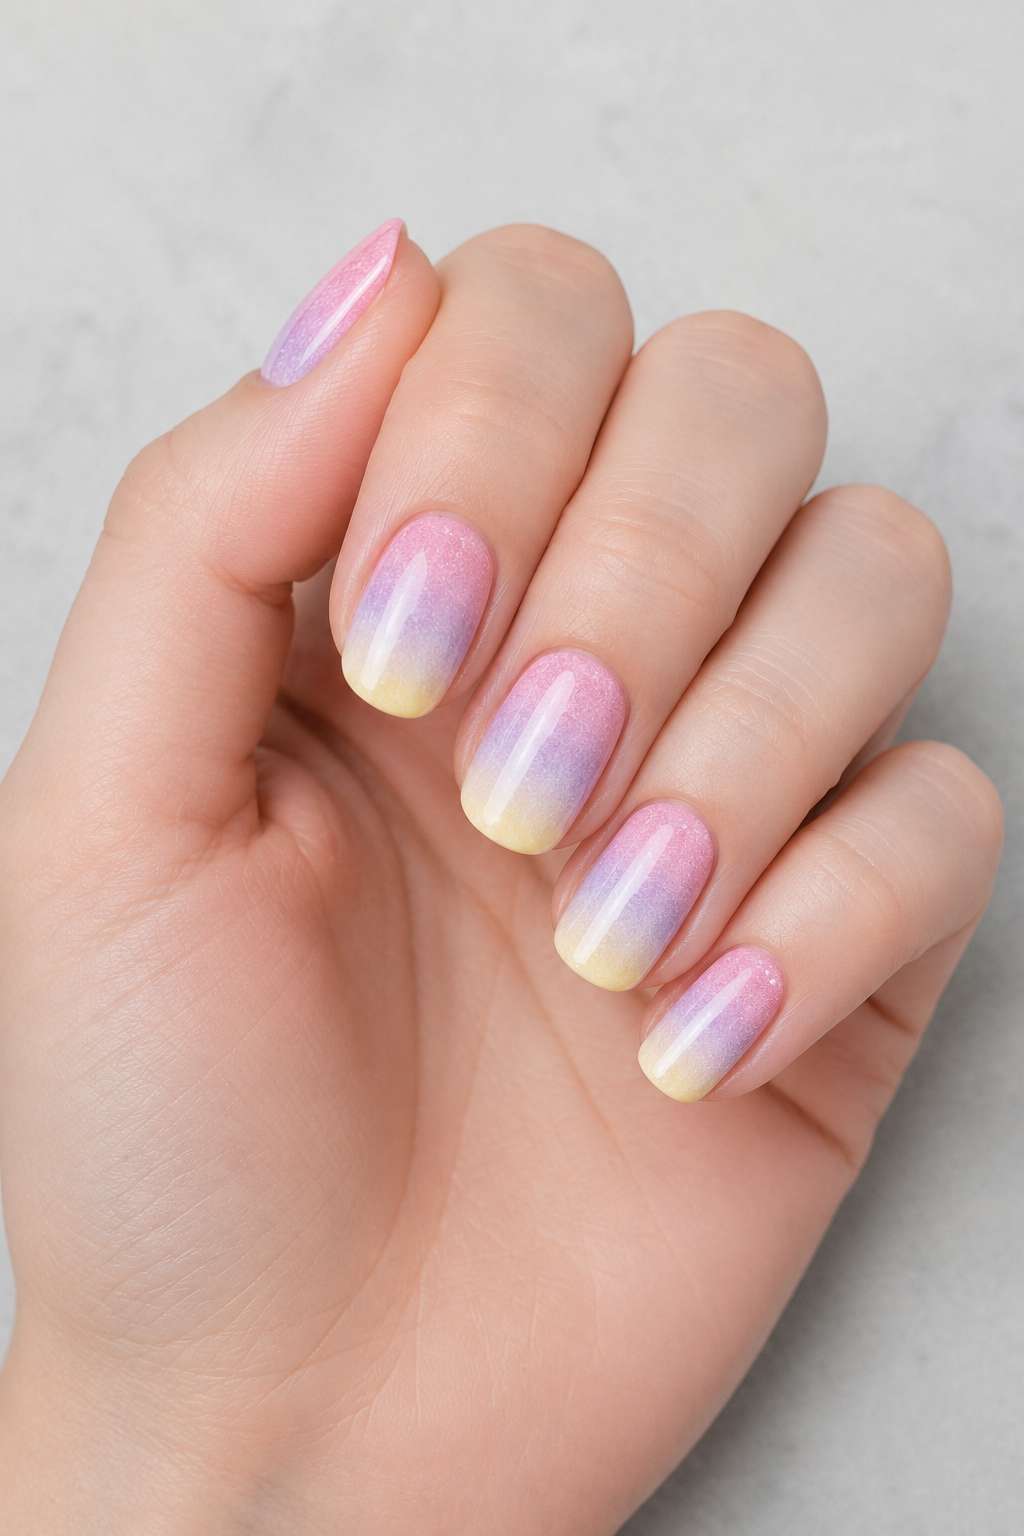
Pastel Ombre Gradient – Soft & Dreamy
Why it works: Creates an ombré effect that looks complicated but uses a simple sponge technique.
Materials:
- 3 pastel shades (light pink, soft lavender, pale yellow)
- Makeup sponge
- Base and top coat
Step-by-Step Instructions:
- Apply light pink as base
- Paint thin stripes of pastel shades on a sponge
- Dab the sponge on nails multiple times
- Blend the colors by dabbing gently
- Clean edges and apply top coat
Beginner Tip: Go slow with water between applications to avoid over-blending.
Dainty Line Art Nails – Minimalist & Chic
Why it works: Ultra-simple black lines on white base. Instagram-worthy but takes only 2 minutes.
Materials:
- White base polish
- Black thin-liner nail pen or toothpick
- Top coat
Step-by-Step Instructions:
- Apply white base (2 layers)
- Use a thin-liner to draw simple wave patterns, straight lines, or abstract shapes
- Keep design to one or two lines per nail
- Seal with glossy top coat
Beginner Tip: Practice on paper first. Confidence shows in the brush strokes!

You May Like: Summer Heat Meets Quiet Luxury: The 2026 Nail Art Guide for the Modern
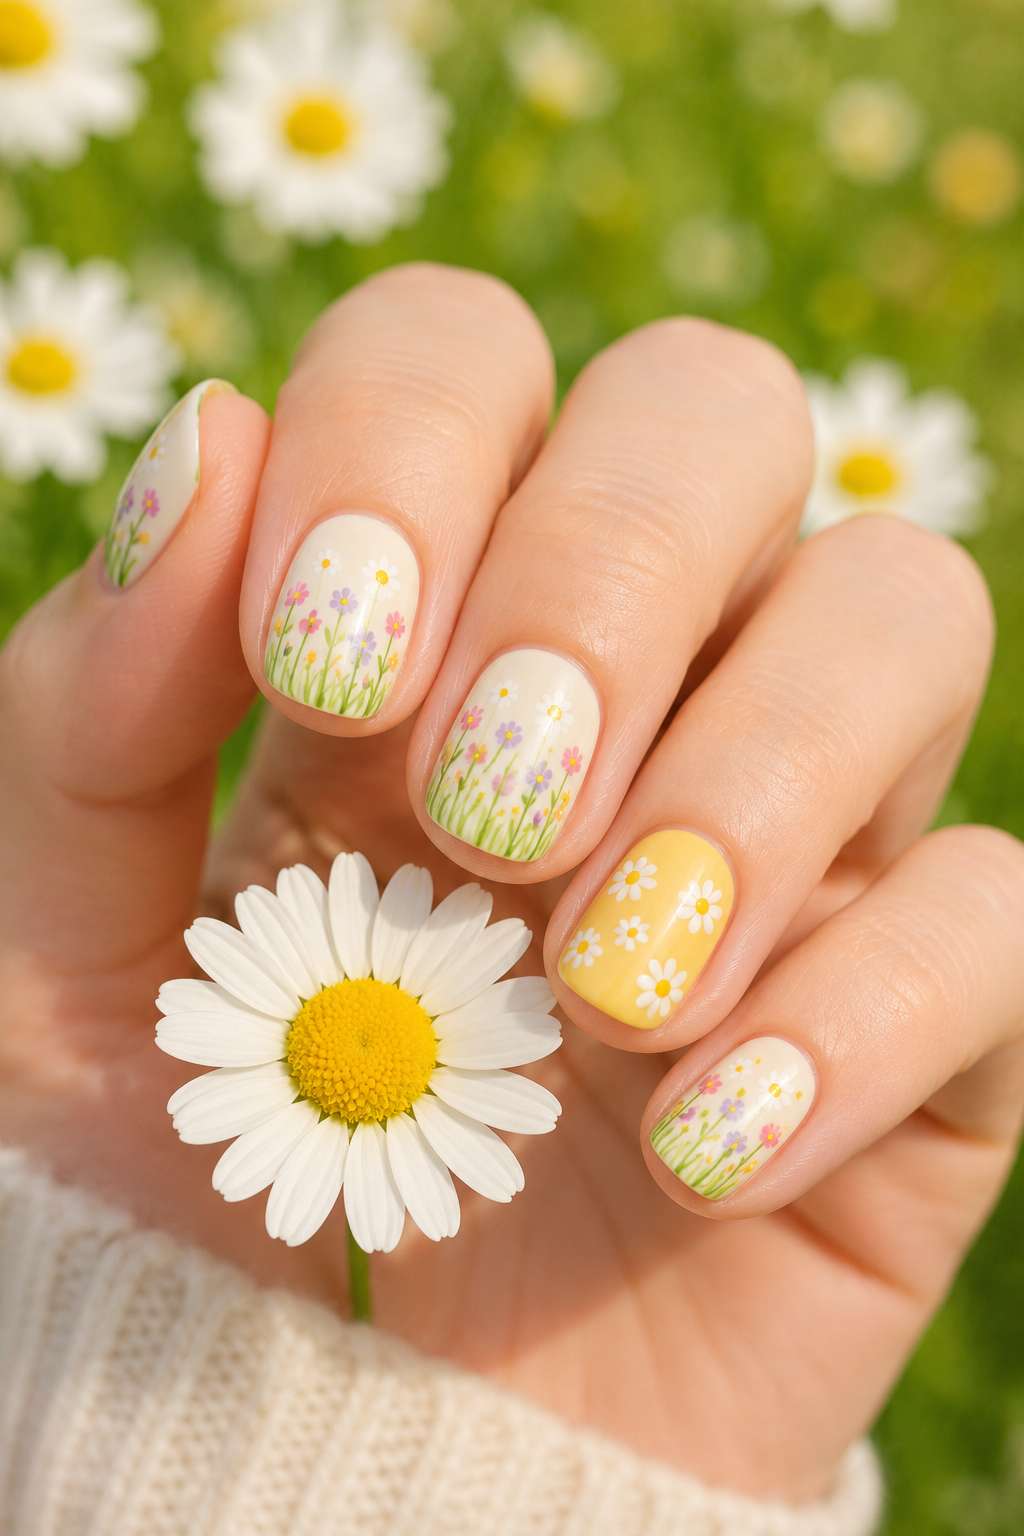
Spring Meadow Design – Floral Field Effect
Why it works: Scattered flowers create visual interest without requiring precision.
Materials:
- Cream base polish
- Green polish
- Pink, yellow, purple polish for flowers
- Thin brush or dotting tool
Step-by-Step Instructions:
- Apply cream base (2 layers)
- Paint thin green lines as grass strokes
- Use dotting tool to create flower heads in pink, yellow, purple
- Add tiny green stems
- Top coat for shine
Beginner Tip: Less is more. 3-4 flowers per nail looks better than 10.
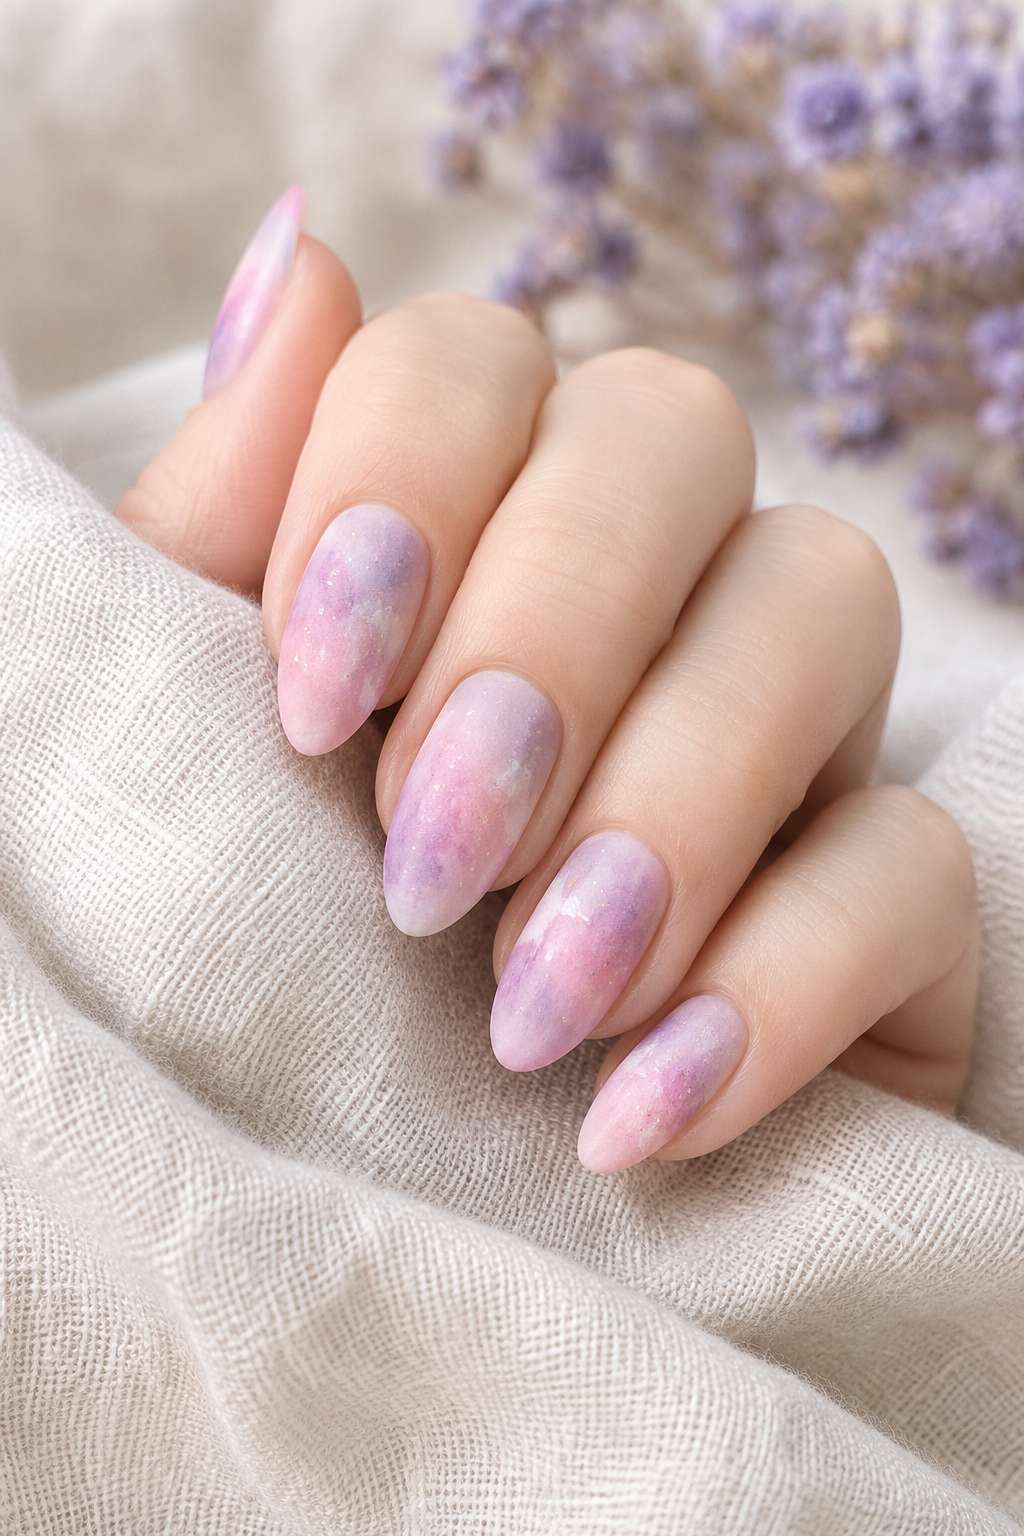
Soft Petal Pattern – Watercolor Vibes
Why it works: Looks artistic; uses a sponging technique that’s very forgiving.
Materials:
- Light neutral base
- 2-3 soft pastel shades
- Makeup sponge
- Water
Step-by-Step Instructions:
- Apply neutral base
- Sponge one color lightly across the nail
- Layer second color on one side
- Blend with damp sponge
- Add optional white accents for highlights
Beginner Tip: Damp sponge = softer blending. This is your friend!
Geometric Spring Shapes – Modern & Clean
Why it works: Straight lines are easier to control than curved ones.
Materials:
- Pastel base color
- Contrasting pastel for shapes
- Thin brush or striping tape
- Top coat
Step-by-Step Instructions:
- Apply pastel base
- Use striping tape to create triangle, square, or hexagon shapes
- Fill shapes with second pastel color
- Remove tape carefully
- Seal with top coat
Beginner Tip: Apply base coat before tape to prevent peeling.
Negative Space Floral – Trendy & Unique
Why it works: Shows your nail’s natural color as part of the design. Looks expensive!
Materials:
- Pastel polish
- Thin brush
- Stencil or tape (optional)
Step-by-Step Instructions:
- Paint entire nail in pastel color
- Leave small unpainted sections (flower shapes, stems)
- Outline the negative spaces with thin lines
- Add details as desired
- Top coat
Beginner Tip: Draw designs on paper first to visualize spacing.
Color-Blocked Nails – Bold & Graphic
Why it works: Different solid colors on each nail look cohesive and pre-planned.
Materials:
- 3-4 complementary spring pastels
- Striping tape (optional)
Step-by-Step Instructions:
- Paint each nail a different pastel shade
- Add a horizontal line of contrasting color on one or two nails
- Keep design geometric and intentional
- Top coat for longevity
Beginner Tip: Coordinate colors before painting. Pastels always work well together!
Simple Butterfly Wings – Playful & Cute
Why it works: Symmetry makes this easier than you’d think.
Materials:
- Light base color
- Thin brush
- 2 contrasting colors for wings
Step-by-Step Instructions:
- Apply light base coat
- Paint a thin vertical line in the center (body)
- Paint curved wing shapes on both sides
- Add patterns or dots to wings if desired
- Seal with top coat
Beginner Tip: Fold nail in half mentally to ensure symmetry.
Tree Branch Design – Nature-Inspired
Why it works: Imperfect branches actually look more natural.
Materials:
- Neutral beige base
- Brown thin-liner
- Green polish for leaves
Step-by-Step Instructions:
- Apply beige base
- Draw thin brown branches at angles
- Add small green oval leaves along branches
- Let it look organic and natural
- Top coat
Beginner Tip: Branches don’t have to be perfectly straight—that’s the beauty of nature!
Watercolor Effect – Artistic & Soft
Why it works: The technique is intentionally irregular, so perfection isn’t required.
Materials:
- White or cream base
- 2-3 watercolor-style polishes
- Makeup sponge
- Water
Step-by-Step Instructions:
- Apply base coat
- Drop polish onto sponge and tap onto nail
- Add second color overlapping the first
- Use damp sponge to blend and diffuse colors
- Create a faded, artistic effect
Beginner Tip: This technique allows happy accidents to become beautiful details!
Gradient Sunset Nails – Warm & Inviting
Why it works: Uses a gradient technique that’s trending everywhere.
Materials:
- Pink, coral, orange, yellow polishes
- Makeup sponge
- Top coat
Step-by-Step Instructions:
- Paint thin stripes of each color on sponge
- Dab on nail starting from one edge
- Gently sponge back and forth to blend
- Build up color gradually
- Seal with matte or glossy coat
Beginner Tip: More sponge dabs = better blending.
Dotted Daisy Pattern – Classic & Fresh
Why it works: Dots are the most beginner-friendly technique.
Materials:
- Yellow base
- White polish
- Thin brush for center detail
Step-by-Step Instructions:
- Apply yellow base (2 layers)
- Create daisy flowers using white dots arranged in circles
- Add a small yellow or black dot in each center
- Space daisies across the nail
- Top coat
Beginner Tip: Use a toothpick dipped in polish for consistent dot size.
Striped Spring Nails – Clean & Minimal
Why it works: Stripes are linear, making them easier to control than curves.
Materials:
- Pastel base color
- Contrasting pastel for stripes
- Striping tape or thin brush
Step-by-Step Instructions:
- Apply base color (2 layers)
- Apply horizontal or diagonal stripes using tape or thin brush
- Ensure equal spacing between stripes
- Remove tape carefully (if using)
- Top coat
Beginner Tip: Let each color dry between applications for crisp lines.
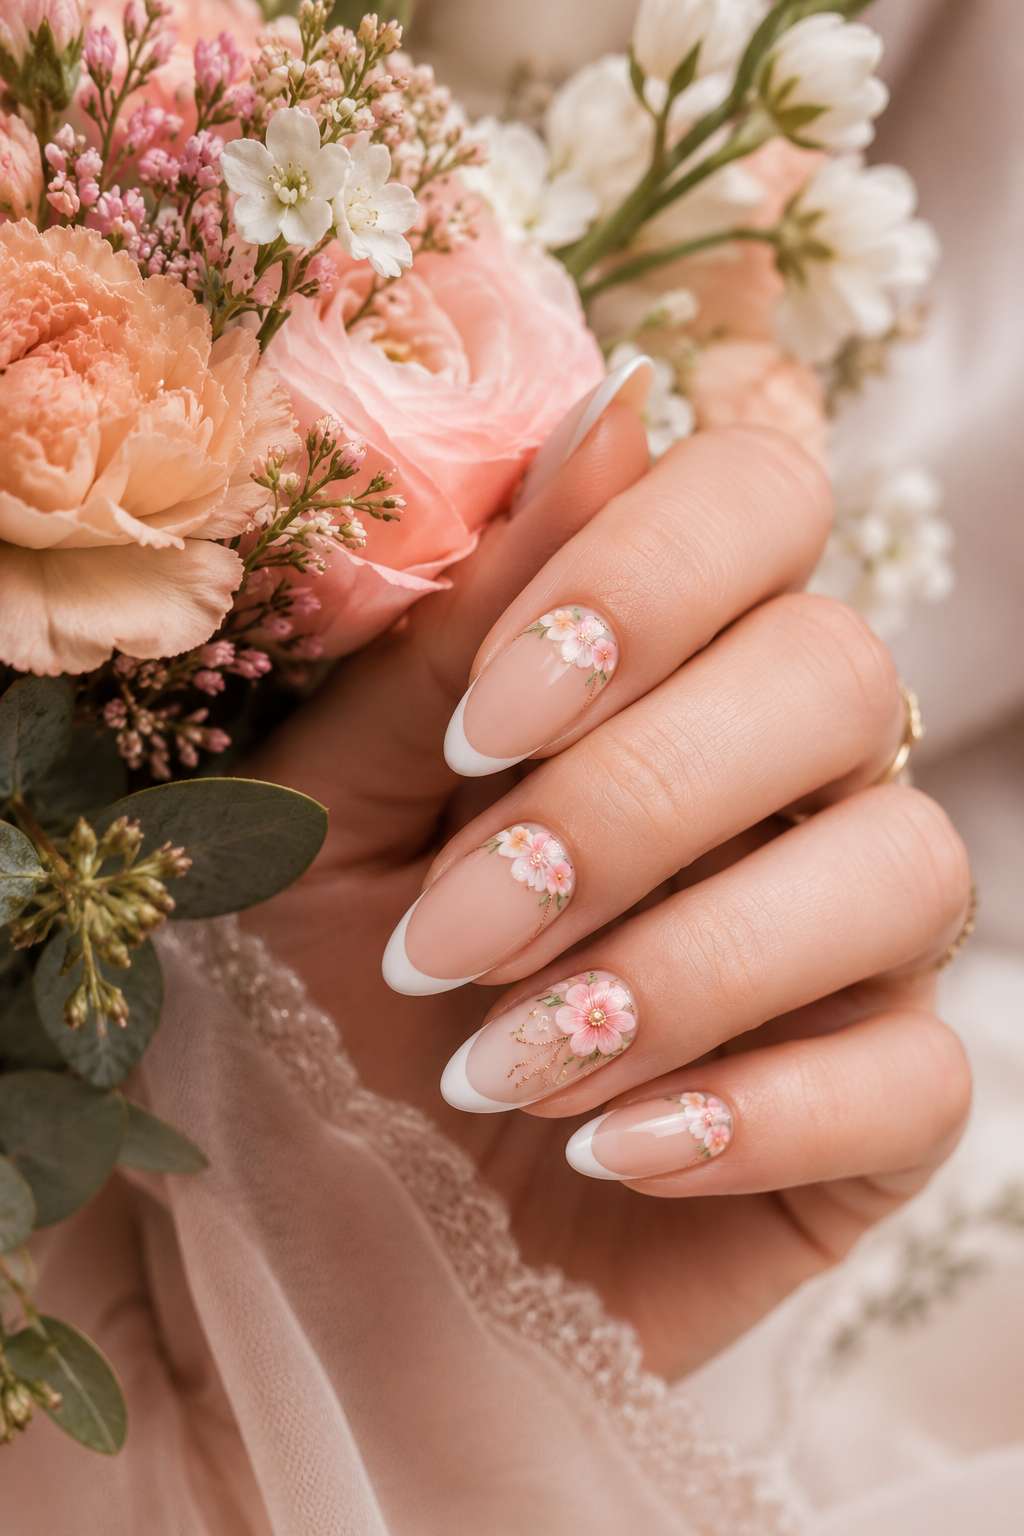
French Tip with Flowers – Elegant & Feminine
Why it works: Combines classic French tips with a trendy spring twist.
Materials:
- Nude or white base
- White polish for tips
- Pink or peach polish for flowers
Step-by-Step Instructions:
- Apply nude base
- Paint white tips (French manicure style)
- Add small flower details near the cuticle area
- Use dotting tool for flower petals
- Seal with glossy top coat
Beginner Tip: Use white striping tape as a guide for perfect French tips.
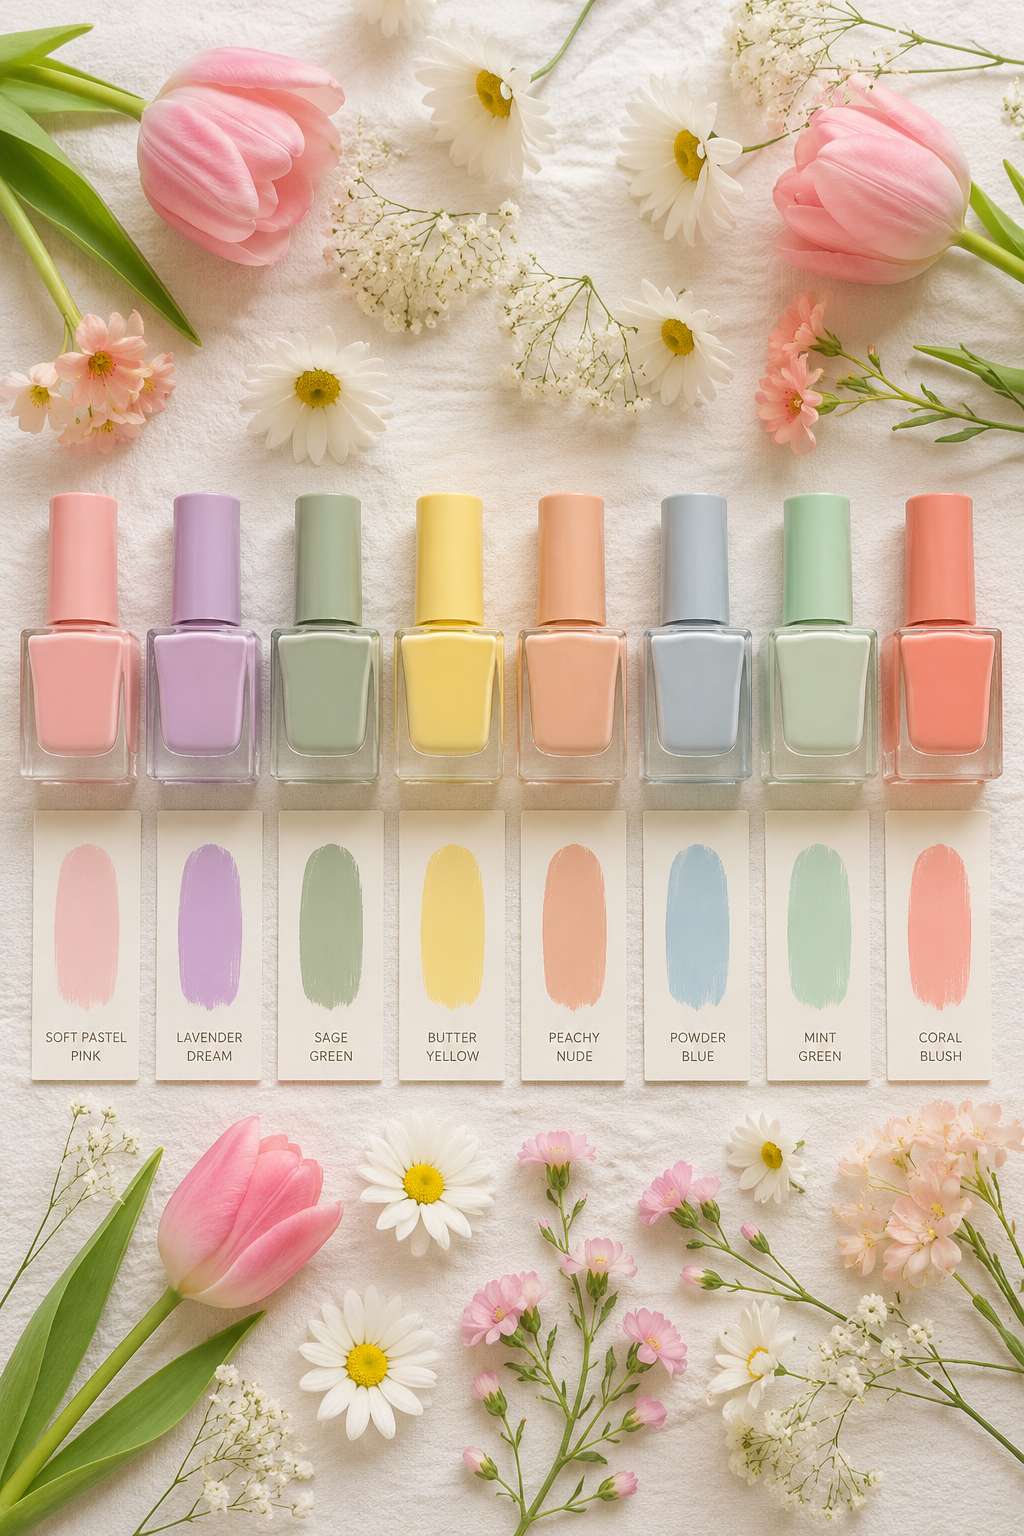
Best Spring Nail Colors for 2026 (Trending Palette)
Pinterest and Google data show these colors are dominating spring 2026:
| Color Name | Hex Code | Vibe |
|---|---|---|
| Soft Pastel Pink | #FFB6D9 | Romantic, pairs with everything |
| Lavender Dream | #E6D5FF | Relaxing, Pantone-approved |
| Sage Green | #9DC183 | Nature-inspired, eco-conscious |
| Butter Yellow | #FFFACD | Optimistic, springtime symbol |
| Peachy Nude | #FDBCB4 | Versatile, suits all skin tones |
| Powder Blue | #B0E0E6 | Fresh, summery transition |
| Mint Green | #98FF98 | Clean, minimalist appeal |
| Coral Blush | #FF7F50 | Bold but wearable |
Pro Tip: Combine two complementary colors from this palette for maximum Pinterest appeal.
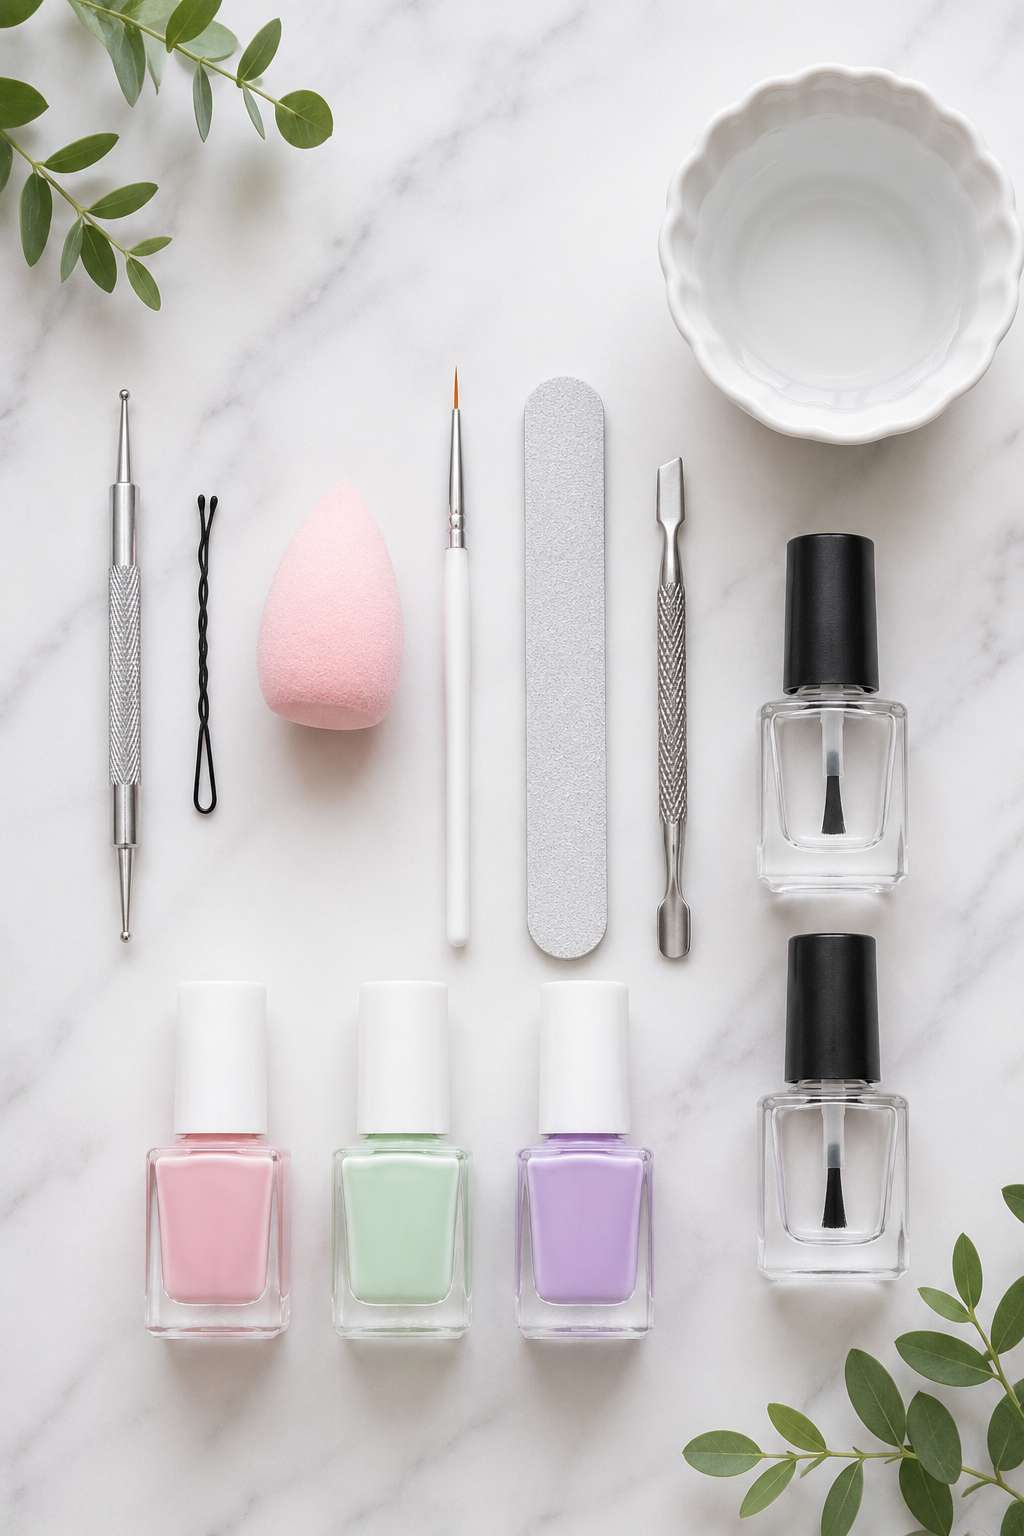
Tools & Materials You Need for Beginner Nail Art (Budget-Friendly)
You don’t need to spend a fortune! Here’s what every beginner should have:
Essential Tools (approximately $15-25):
- Nail file and buffer
- Cuticle pusher
- Dotting tools (or use a bobby pin!)
- Thin-liner brush or toothpick
- Makeup sponge (for ombré effects)
- Nail polish remover
Recommended Polishes (approximately $20-30):
- Base coat (prevents staining)
- Top coat (increases longevity)
- 3-4 Spring Pantone shades
- Black or white for accents
Budget Hack: Dollar store sponges, bobby pins, and old makeup brushes work just as well as expensive tools!
Recommended Brands:
- Sally Hansen (budget-friendly)
- Essie (mid-range, reliable)
- OPI (professional-grade)
- Gel-It (if you want long-lasting designs)
Pro Tips for Beginner Nail Art Success (Dos & Don’ts)
DO:
- Use a base coat always (prevents staining and improves adhesion)
- Apply thin layers (thick = longer drying, potential smudging)
- Keep top coat handy for touch-ups
- Invest in quality brushes (they last longer and provide better control)
- Practice patience (slow strokes = cleaner lines)
- Take breaks between nails (prevents smudging)
DON’T:
- Skip the top coat (your design won’t last)
- Rush the drying process (20-30 minutes is standard)
- Use expired polish (gets thick and streaky)
- Paint nails right after showering (humidity causes bubbles)
- Expect perfection immediately (nail art is a skill—practice makes perfect)
Common Mistakes & How to Fix Them:
| Mistake | Solution |
|---|---|
| Wobbly lines | Use a dotting tool instead of a brush for more control |
| Smudged design | Wait longer between color applications |
| Bubbles in base coat | Apply in thin strokes, not thick gobs |
| Color bleeding under tape | Use base coat before applying tape |
| Dull finish | Always seal with quality top coat |
Frequently Asked Questions (FAQs)
How do beginners do nail art without any experience?
Start with simple designs using dots and strokes. Practice on fake nails first. Use a dotting tool instead of a brush—it’s more forgiving. YouTube tutorials are your best friend!
What’s the easiest nail design for complete beginners?
Minimalist dots or simple stripes are the easiest. They require only a dotting tool or thin brush, and imperfections actually enhance the aesthetic.
Can I do nail art at home without professional equipment?
Absolutely! Use a bobby pin as a dotting tool, a makeup sponge for gradients, and old makeup brushes for detailing. Total cost: under $20.
How long do DIY spring nail designs last?
With a good top coat, 7-10 days. Gel designs last up to 3 weeks but require UV lamps.
What’s the best top coat for long-lasting nail art?
Look for “quick-dry” and “high-shine” formulas. Seche Vite and Sally Hansen are budget-friendly options.
Can I use regular nail polish for nail art?
Yes! Regular polish works fine for beginners. Using thin layers prevents thick, clumpy designs.
How do I prevent my nail art from smudging?
Wait at least 20 minutes between coats. Use a fan or hair dryer on cool setting. Always use a quality top coat.
Are there trending spring nail colors for 2026?
Yes! Soft pastels (pink, lavender, yellow) and muted earth tones (sage green, peachy nude) are huge this spring.
Conclusion: Your Spring Nail Art Journey Starts Now
Spring is the perfect time to master easy spring nail art designs for beginners and join the millions of people creating gorgeous nails at home. Whether you choose the minimalist flower dots, the dreamy pastel ombre gradient, or any of the other 13 designs we’ve covered, you have everything you need to succeed.
Remember: Every professional nail artist started as a beginner. Your first attempts might not be Instagram-perfect, but each design will teach you something new. The beauty of DIY nail art is that it’s affordable, fun, and deeply personal.
Ready to get started?
- Pick your favorite design from this list
- Grab the materials (total cost: $20-30)
- Watch a YouTube tutorial for your chosen design
- Practice on fake nails first
- Share your creation on Pinterest and watch the compliments roll in!
Save this for later!
Pin this article on your Pinterest board and bookmark it for future inspiration. Come back anytime you need fresh ideas for trending spring nail art, seasonal designs, or beginner tutorials.